Supabase Realtime 을 통한 채팅 구현 - 4
갑자기 바빠져서 작성하지 못해 밀린 내용이 많다.. 기억이 흐려지기 전에 얼른 쓰자..
먼저 해결해야할 내용은 채팅 내역을 가져오는 동시에, 메시지를 보낸 유저의 정보를 같이 가져올 필요가 있었다.
1
2
3
4
5
6
7
8
9
10
11
12
13
const getAllMessages = async () => {
  const { data, error } = await supabase
    .from("Messages")
    .select(`*, Users (nickname, profile_image_url)`) // user_id 를 통해 관계가 맺어져 있어서 참조가 가능한 듯?
    .order("sent_at", { ascending: true });

  if (error) {
    console.error(error);
    return;
  }

  setMessages(data as MessageRow[]);
};
.select("*") => 일반적으로 데이터를 가져오는 경우에는 이렇게 단순히 표현하면 된다.
그런데, 이때 유저 정보를 함께 가져오려면 어떻게 할 수 있을까??
이전에 데이터 베이스 관계를 구성할 때, Users 테이블의 user_id 와 Messages 테이블의 user_id 값 사이 관계성을 부여했었다. .select("*, Users (nickname, profile_image_url")) => Users 테이블의 user_id 와 foreign key 관계이기에 DB 에서 user_id 값이 똑같은 데이터만 반환해준다.
물론, 이게 가능하기 위해서는 각 테이블 간 1:1 로 foreign key 가 존재해야 한다. 한 테이블과 2개 이상의 foreign key 관계가 있다면 어떤 값을 가져올 지 몰라 오류가 발생한다!
다음으로 할 일은, 채팅 메시지 입력 창을 만드는 것이었다.
처음에는 textarea 를 사용했다.
1
2
3
4
5
6
7
8
9
10
11
12
13
14
15
16
17
18
19
20
21
22
23
24
25
26
27
28
29
30
31
32
33
34
35
36
37
38
<div
  id="input"
  className="self-stretch h-[145px] w-full p-5 bg-[#141415] rounded-bl-[20px] rounded-br-[20px] flex-col justify-center items-center flex"
>
  <div className="w-full h-full self-stretch justify-between items-start inline-flex">
    <div
      className="w-full h-full grow shrink basis-0 text-[#5e5e5e] text-sm font-normal mr-2 font-['Pretendard'] leading-[21px] break-all overflow-y-hidden whitespace-pre-wrap break-words"
      contentEditable
      onFocus={() => {
        if (editableDivRef.current) {
          editableDivRef.current.innerHTML = "";
        }
      }}
      onBlur={() => {
        if (editableDivRef.current) {
          editableDivRef.current.innerHTML = "메시지를 입력해주세요.";
        }
      }}
      suppressContentEditableWarning={true}
      ref={editableDivRef}
    >
      메시지를 입력해주세요.
    </div>

    <div className="justify-center items-center flex">
      <div className="w-5 h-5 p-1 justify-center items-center flex">
        <div className="justify-center items-center flex">
          <textarea
            ref={hiddenTextareaRef}
            placeholder="메시지를 입력하세요"
            className="hidden"
          />
          <button>전송</button>
        </div>
      </div>
    </div>
  </div>
</div>
그랬다가, 여기에서 textarea 기본 디자인을 바꾸려고 시도하다가 어디선가 div 요소에 contenteditable 속성을 부여하면 입력창으로 쓸 수 있다고 해서 시도해봤다. div 에 contenteditable 속성을 적용한 뒤 textarea 는 hidden 속성을 넣어주고 이를 대체하기로 했다.
하지만 div 내의 텍스트들은 submit 이벤트로 전송이 불가능했다. 임시 방편으로 submit 이벤트 핸들러를 통해 div 의 innerHTML 속성 값을textarea 의 value 로 사용했다.
그런데, 이렇게 하니 공백 문자 사이에 <div></div> 가 삽입되는 문제가 있었다. 이를 방지하기 위해서 textContent 속성 값을 이용했지만 줄 바꿈이 해결되지 않았다.
게다가 placeholder 처럼 focus 시엔 내용이 사라져야했는데 이것도 적용이 안 됐다. 그래서 생각한 방법이 onFocus 이벤트와 onBlur 이벤트를 활용하는 것이었다. onblur 사용했는데 메시지 submit 직전에 먼저 설정이 되어서 내용이 보내지지 않았다……
결국엔 textarea 를 다시 사용하고, 개별적으로 스타일을 적용하기로 했다. 다시는 괜한 짓 하지 않을 것이다…
이후 토글 기능을 넣기 위해 isOpen 이라는 상태를 하나 추가하고 조건부 렌더링을 적용했다.
1
2
3
4
5
6
7
8
9
10
11
12
13
14
15
16
17
18
19
20
21
22
23
24
25
26
27
28
29
30
31
32
33
34
35
36
37
38
39
40
41
42
43
44
45
46
47
48
49
50
51
52
53
54
55
56
57
58
59
60
61
62
63
64
65
66
67
68
<form action="" className="w-full" onSubmit={(evt) => handleSubmit(evt)}>
{user ? (
<div
id="input"
className="self-stretch h-[145px] w-full p-5 bg-[#141415] rounded-bl-[20px] rounded-br-[20px] flex-col justify-center items-center flex"
>
<div className="w-full h-full self-stretch justify-between items-start inline-flex">
<div
className="w-full h-full grow shrink basis-0 text-[#5e5e5e] text-sm font-normal mr-2 font-['Pretendard'] leading-[21px] break-all overflow-y-hidden whitespace-pre-wrap break-words"
contentEditable
onInput={handleInput}
onFocus={() => {
if (editableDivRef.current) {
editableDivRef.current.textContent = "";
setIsHidden(false);
}
}}
onBlur={() => {
if (editableDivRef.current) {
// editableDivRef.current.textContent = "메시지를 입력해주세요.";
}
}}
suppressContentEditableWarning={true}
ref={editableDivRef}
>
메시지를 입력해보세요.
</div>
<div className="justify-center items-center flex">
<div className="w-5 h-5 p-1 justify-center items-center flex">
<div className="justify-center items-center flex">
<textarea
ref={hiddenTextareaRef}
placeholder="메시지를 입력하세요"
className="hidden"
/>
<button
className={
!isHidden && editableDivRef.current?.textContent
? ""
: "hidden"
}
>
전송
</button>
</div>
</div>
</div>
</div>
</div>
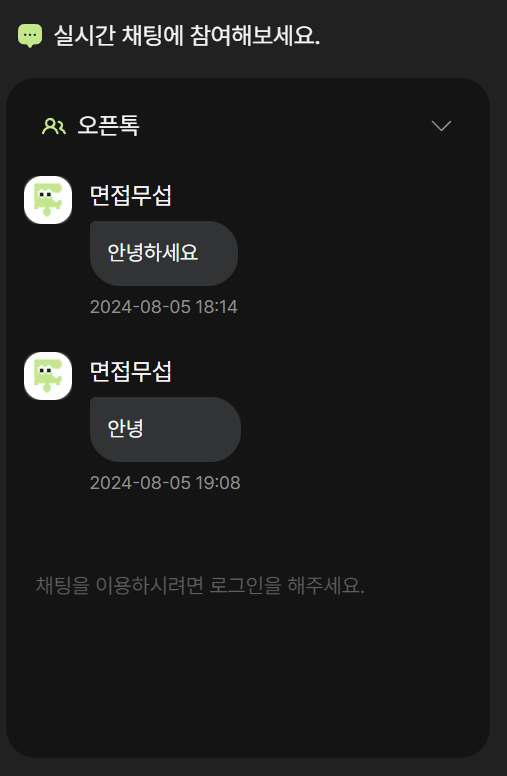
) : (
<div
id="input"
className="self-stretch h-[145px] w-full p-5 bg-[#141415] rounded-bl-[20px] rounded-br-[20px] flex-col justify-center items-center flex"
>
<div className="w-full h-full self-stretch justify-between items-start inline-flex">
<div className="w-full h-full grow shrink basis-0 text-[#5e5e5e] text-sm font-normal mr-2 font-['Pretendard'] leading-[21px] break-all overflow-y-hidden whitespace-pre-wrap break-words">
채팅을 이용하시려면 로그인을 해주세요.
</div>
<div className="justify-center items-center flex">
<div className="w-5 h-5 p-1 justify-center items-center flex">
<div className="justify-center items-center flex"></div>
</div>
</div>
</div>
</div>
)}
</form>
마지막으로, 메시지 전송 시 스크롤이 자동으로 내려가야했다.
1
2
3
4
5
6
7
useEffect(() => {
  if (chatContentDiv.current && shouldScroll) {
    chatContentDiv.current.scrollTop = chatContentDiv.current.scrollHeight;

    setShouldScroll(false);
  }
}, [messages]);
메시지가 새로 업데이트 될 때마다 스크롤이 옮겨지도록 설정했다. 다만, 처음 마운트 시에는 동작하지 않아서 추가로 설정해야할 것 같다.
이제 스크롤의 기능을 남겨두고 스크롤 바 자체는 나타나지 않도록 만들고 싶었다.
그런데, tailwindcss 에서는 별도의 옵션을 제공하고 있지 않아서 열심히 찾아보았더니
tailwind-scrollbar-hide 라는 라이브러리를 설치하면 scroll-hide 라는 className 으로 간단히 적용할 수 있다는 것을 알았다!
이제야 채팅창 구현이 되었다..
하지만 이 친구가 향후 큰 문제를 일으킬 것이라고는 생각 못 했다..